Homemade Ricotta- UPDATE

homemade ricotta shown with my homemade olive bread
Making “ricotta” type cheese at home is so easy I am ashamed for ever buying it- I certainly won’t buy it again. Think about it, if I am at the store and I need ricotta I’ll just buy some cream and make it myself. Yeah, yeah, I hear you. “Darla’s turning into some whacky -hippie-amish-earth-mother-dairy elitist.”
Yes I am, yes, I certainly am. (why not black IS so slimming and tie-dye is so fun!)
Anyway it’s exactly three ingredients (plus salt) and easy as… pie. (I hope!) I have made it twice. Once with champagne vinegar, and once with Meyer lemon juice and white wine vinegar combination. The acid is what makes the milk curdle into … curds. I found the all vinegar version to be firmer and more curdy- the lemon juice version less curdy but a nice subtle lemony flavor. Meyer lemons have less acid that vinegar or even regular lemons for that matter- but I am obsessed with them. This is just another sneaky way for me try them out.
Home Made Ricotta ( Inspired by Ina Garten’s Recipe)
4 cups whole milk
2 cups heavy cream
1 tea-spoon kosher salt
2 table spoons of white wine vinegar
2 tablespoons of Meyer lemon juice
Mix the cream and milk with the salt, bring to a real boil. Turn off the heat. Add vinegar/lemon juice. stir. Wait one minute and then spoon into a cheese cloth lined sieve sitting over a bowl. Drain the cheese for as long as you wish up to a couple of hours, or over night in the fridge. Viola! Ricotta/ farmer’s cheese. (you can drink the whey left in the bowl or give it to your dogs as a treat poured over their kibble)
I LOVE to eat this on bread, fruit and I will use it to make pasta dishes if there is any left. I tend to revisit it many times in the day. It’s deelish warm when you first make it- it’s deelish cold too. A spoonful here, a spoonful there…. you get the idea I am sure. 😉
Try this easy peasy recipe. You will be very very happy you did and be well on your way to being a dairy snob.
** UPDATE **
If you use the vinegar only use 3TBS total vinegar. (this is the original recipe from Barefoot Contessa) I cut the vinegar and doubled the remaining acid amount since I was using Meyer Lemon juice.
No shame, Just Skills!
![]()
I think my weakest spot in the kitchen is my knife skills. Knife skills effect everything! My chopping shame haunts me daily. The way the food cooks is affected by how it’s cut, the final look of the dish and presentation suffer. The importance of cutting things uniformly can’t be overstated. (Great.) I’m not afraid to bake a cake but I’m embarrassed by my salads!
And of course the way life goes is the thing that we are most likely to avoid is that thing the universe puts directly in front of us to address. When I started my cooler than cool America’s Test Kitchen Cooking School blogger scholarship -before I dove into Apple Pies at Bridget’s suggestion, I started with cooking fundamentals. And there was–right in front of me knife skills!
I watched the video instructions a couple of times and decided that my knives were not ready for me. (procrastination?) So I called Precision Sharpening here in Houston and had them come over and sharpen all of my knives and talk to me about how to take care of them. I’d already looked at the cooking school’s blog regarding knives and sharpening also had communicated with the author about it, but I thought I would start with a professional sharpen and vow to take care of them properly from now on.
So, with my newly sharpened knives and my wonderful laptop in the kitchen on the counter I got started on my skills, and I give this to you my before and after.
Chop an Onion:

before

after
Dice a carrot:

before

after
Mince garlic:

I never minced garlic, I always used a press.

after: minced by hand
Chop parsley:

before

after
Also included are the instructions on how to cut on a bias, but that’s pretty easy peasy. My before and after were the same.
There it is. Knife skills. I’m not done with these by any stretch. I know that these skills are ongoing, and I shall challenge myself to use these new skills in my everyday cooking. Practice makes perfect (or at least better) and these techniques transfer to many other veggies. Soon my shameful salads will be works of art!
Cracker and Bread Specimens

from left: olive oil cracker, oatmeal diamonds, polenta cheese animal crackers, sesame crackers. seedy flat crisp. cheddar poppy seed cracker.

from top left: olive peasant bread, nice little oatmeal bread, nearly no knead white, nearly no knead white with polenta
Happy Easter Y’all !

smiley George sez: keep smiling!
Aggravation Banana Bread

irritated yet?
I get aggravated sometimes when I am cooking. Maybe I get frustrated because I don’t know how to do something, or maybe it’s because something goes completely wrong. Worst of all is when I get in some imagined rush and I overlook something.
This bread is “Jacked Up Banana Bread” from Smitten Kitchen. She (Deb) got the recipe from a friend of a friend and added a bit of whiskey to the recipe. I don’t know her… but I sho’ likes her style! Anyway this recipe and this bread gave me a bit of the irritated-itis.
I was unfamiliar with the mixing technique. Basically it was mix all wet ingredients (including melted butter) and add the dry ones, one at a time. It threw me off. Irritation. Nevertheless, I also added some walnuts to the bread. Along with the mixing, mix-up , I was taken aback by the volume of batter vs the size of the pan recommended. That little loaf pan was FULL and I wasn’t too impressed with the flavor of the very thin batter either. Heavy sigh.
To be safe I placed the loaf pan on a baking sheet and baked it for just under an hour.
It “didn’t look right.” It was brown and dark. Irritation. I didn’t know if I should leave it in the pan to cool on a rack or take it out of the pan and put the warm loaf on a rack. Irritation. Later without much hope I cut it open. It looked really dark, maybe undercooked. Irritation. I tasted it. Eh. Sigh.

photo shoot is almost over, last slice is almost gone.
Glory, glory for the morning! This morning I took another taste. Kitchen irritation turned to understanding. Another taste. “Not bad.” Another taste. ” hummmm, pretty good.” and then half the lot was gone. I wish I could tell you a friend came over and we devoured that half loaf of boozy, spicy banana bread together while talking about all wonderful things and drinking tea. Truth is, I ate the pieces as I was taking pictures of them. I was all alone- it was one moist and spicy shoot. This loaf is deelish. Buy some bananas, let them go a few days and make this. I plan on making it several more times- and maybe sharing.
3 Day Jam Session
When you think of homemade jelly and jam- what do you think of? Gramma? MawMaw? MeMaw? Yeah, me too. Until I started cooking last year. All sorts of crazy things have been happening, like JAM! Making and preserving jam is cool- and in that vein – I’d like to use my very cool wordpress blog to set the mood for this post about, Jam. Lets start with a little sound. If you’d like you can press the play button on this little player and we’ll get Jammin’…

early berries.
Making jam and canning is very interesting to me. I vaguely remember my Aunt Jenny and Grandmother having canned foods and canning jars around. Canned foods are so beautiful. As an adult I have not given canning or making jams a second thought. But then I did think about it. And I kept thinking about it- And then I did make jam! (did that sound almost biblical?) After lots of research the jam I decided to make was a “3 day recipe.” I know this sounds ridiculous but it’s easy. I like easy, as I have proven time and time again with that bread recipe I can’t get enough of. Three day Jam is lazy jam- I promise- the first two days are just prep and maceration with a little help from time and a bit of boiling.

chunky nice jam
3 Day Jam Session (Strawberry)
For every pound of strawberries that you’re going to use you will need 2 cups of sugar and the juice from one lemon. Please choose berries that are flawless. Cut any bad spots off along with bruises and eat them as you stand there. Yummmm…. but don’t use them in your jam. Jam berries must be flawless. Start with at least 4 pounds of berries. Any less is just a big mess for a little bit of jam.
Day 1: Rinse dry and hull the strawberries. Quarter or have large berries and leave small berries whole. Mix the sugar, berries and the lemon juice in a glass or stainless steel bowl. Cover with plastic and place in the refrigerator. Every so often go in and give it a stir to help dissolve sugar. Leave overnight.
Day 2 In the morning: Bring the strawberry mixture to a boil and boil for 3 minutes stirring occasionally. Pour this mixture into a room temperature bowl and cool it on the countertop uncovered until completely cooled-for at least 6 hours or all day. Cover tightly and refrigerate overnight.
Day 3: Place a colander on top of a sauce pan. Pour the berry mixture into the colander and drain the syrup from the berries. Set the berries aside. Bring the collected syrup to a boil and boil until you reach 220°F on a candy thermometer. This could take a while. Actually it’s going to take a lot longer than you think.
Once you reach 220°F pour the reserved strawberries back into the syrup- gently stir them in. Return this mixture to a boil and boil the preserves until the berries are translucent and the syrup reaches 220°F. There are many ways to determine when your jam is ready. Most commonly used is actual temperature as well as the frozen plate test.
When the jam is ready remove from the heat and skim any foam that has collected on the top. Ladle the preserves into hot, clean prepared, sterilized canning jars, leaving 1/4 inch of headspace. (Please follow your favorite canning instructions. This is a good place to start for comprehensive help)
This jam came out great! I am thrilled to have this new skill to carry me through the summer. I can’t wait for the berry crops to start coming in!

I hope this jam is gonna last!

Darth Vader or Starfleet Logo?
ATK Online Cooking School: Freedom!

from the top: nearly no-knead from ATK, small 7 grain loaf, rye with caraway seeds
“The workshop begins the minute you decide to sign up for it.”
That’s what they (we) say in yoga circles. Any time you sign up for a workshop that involves any sort of spiritual work- we believe that spiritual work begins immediately upon deciding to undertake it. Apparently that is true not only in yoga but in cooking.
![]()

"Nearly no-Knead" risen and ready
If you’ve been here before you probably know that I (and my dear blog) won a scholarship to America’s Test Kitchen online cooking school. Just after announcing the winners- before we got started– ATK held a conference call with the other bloggers who also won. We were being introduced to Bridget Lancaster our teacher, who you probably know from the show. I had not delved into the cooking school yet but the conversation turned to what we were currently working on. I mentioned that I was really obsessed with “no knead bread.” Then a wonderful thing happened… I was told that America’s Test Kitchen has their own version of No- Knead bread, it’s called “Nearly no- knead Bread.” The recipe is slightly different BUT the flavor is HUGELY better. Since I’ve posted about the bread must tell you I’ve made many loaves. And since I have this new recipe from Cook’s Illustrated/America’s Test Kitchen I have made many more loaves of BETTER bread. The recipe is far superior. Period.

"take me to your pastrami"- no- knead rye bread
More than a better recipe for my favorite bread, What I got from that phone call was a freedom! Yep! Freedom that came with the understanding that this is simply a technique! I can make great bread easily at home thanks to the NYT and Mark Bittman’s/ Jim Lahey’s TECHNIQUE. But because of a few minutes interacting with my ATK teacher I found a new confidence to try a few different recipes! I now can make many different types of bread using this no-knead/Dutch oven technique with-out anxiety or worry. I think this is the best part of the school. It’s invaluable to me to be able to know where to go with my questions when I am reading a recipe instead if wondering or worse- wandering all over the internet looking for an answer.
I know I will have plenty of questions while I am on this journey “out of the heat and into the kitchen”, it feels really good to have a place to learn all about the kitchen and cooking at my own pace- but also the confidence of knowing that Bridget’s got my back!
I am starting with kitchen fundamentals. Next post about my ATK online cooking school experience: Before and after knife cuts!

"nice crust" and "hole-y" Nearly No-Knead
Thank God for Spring!
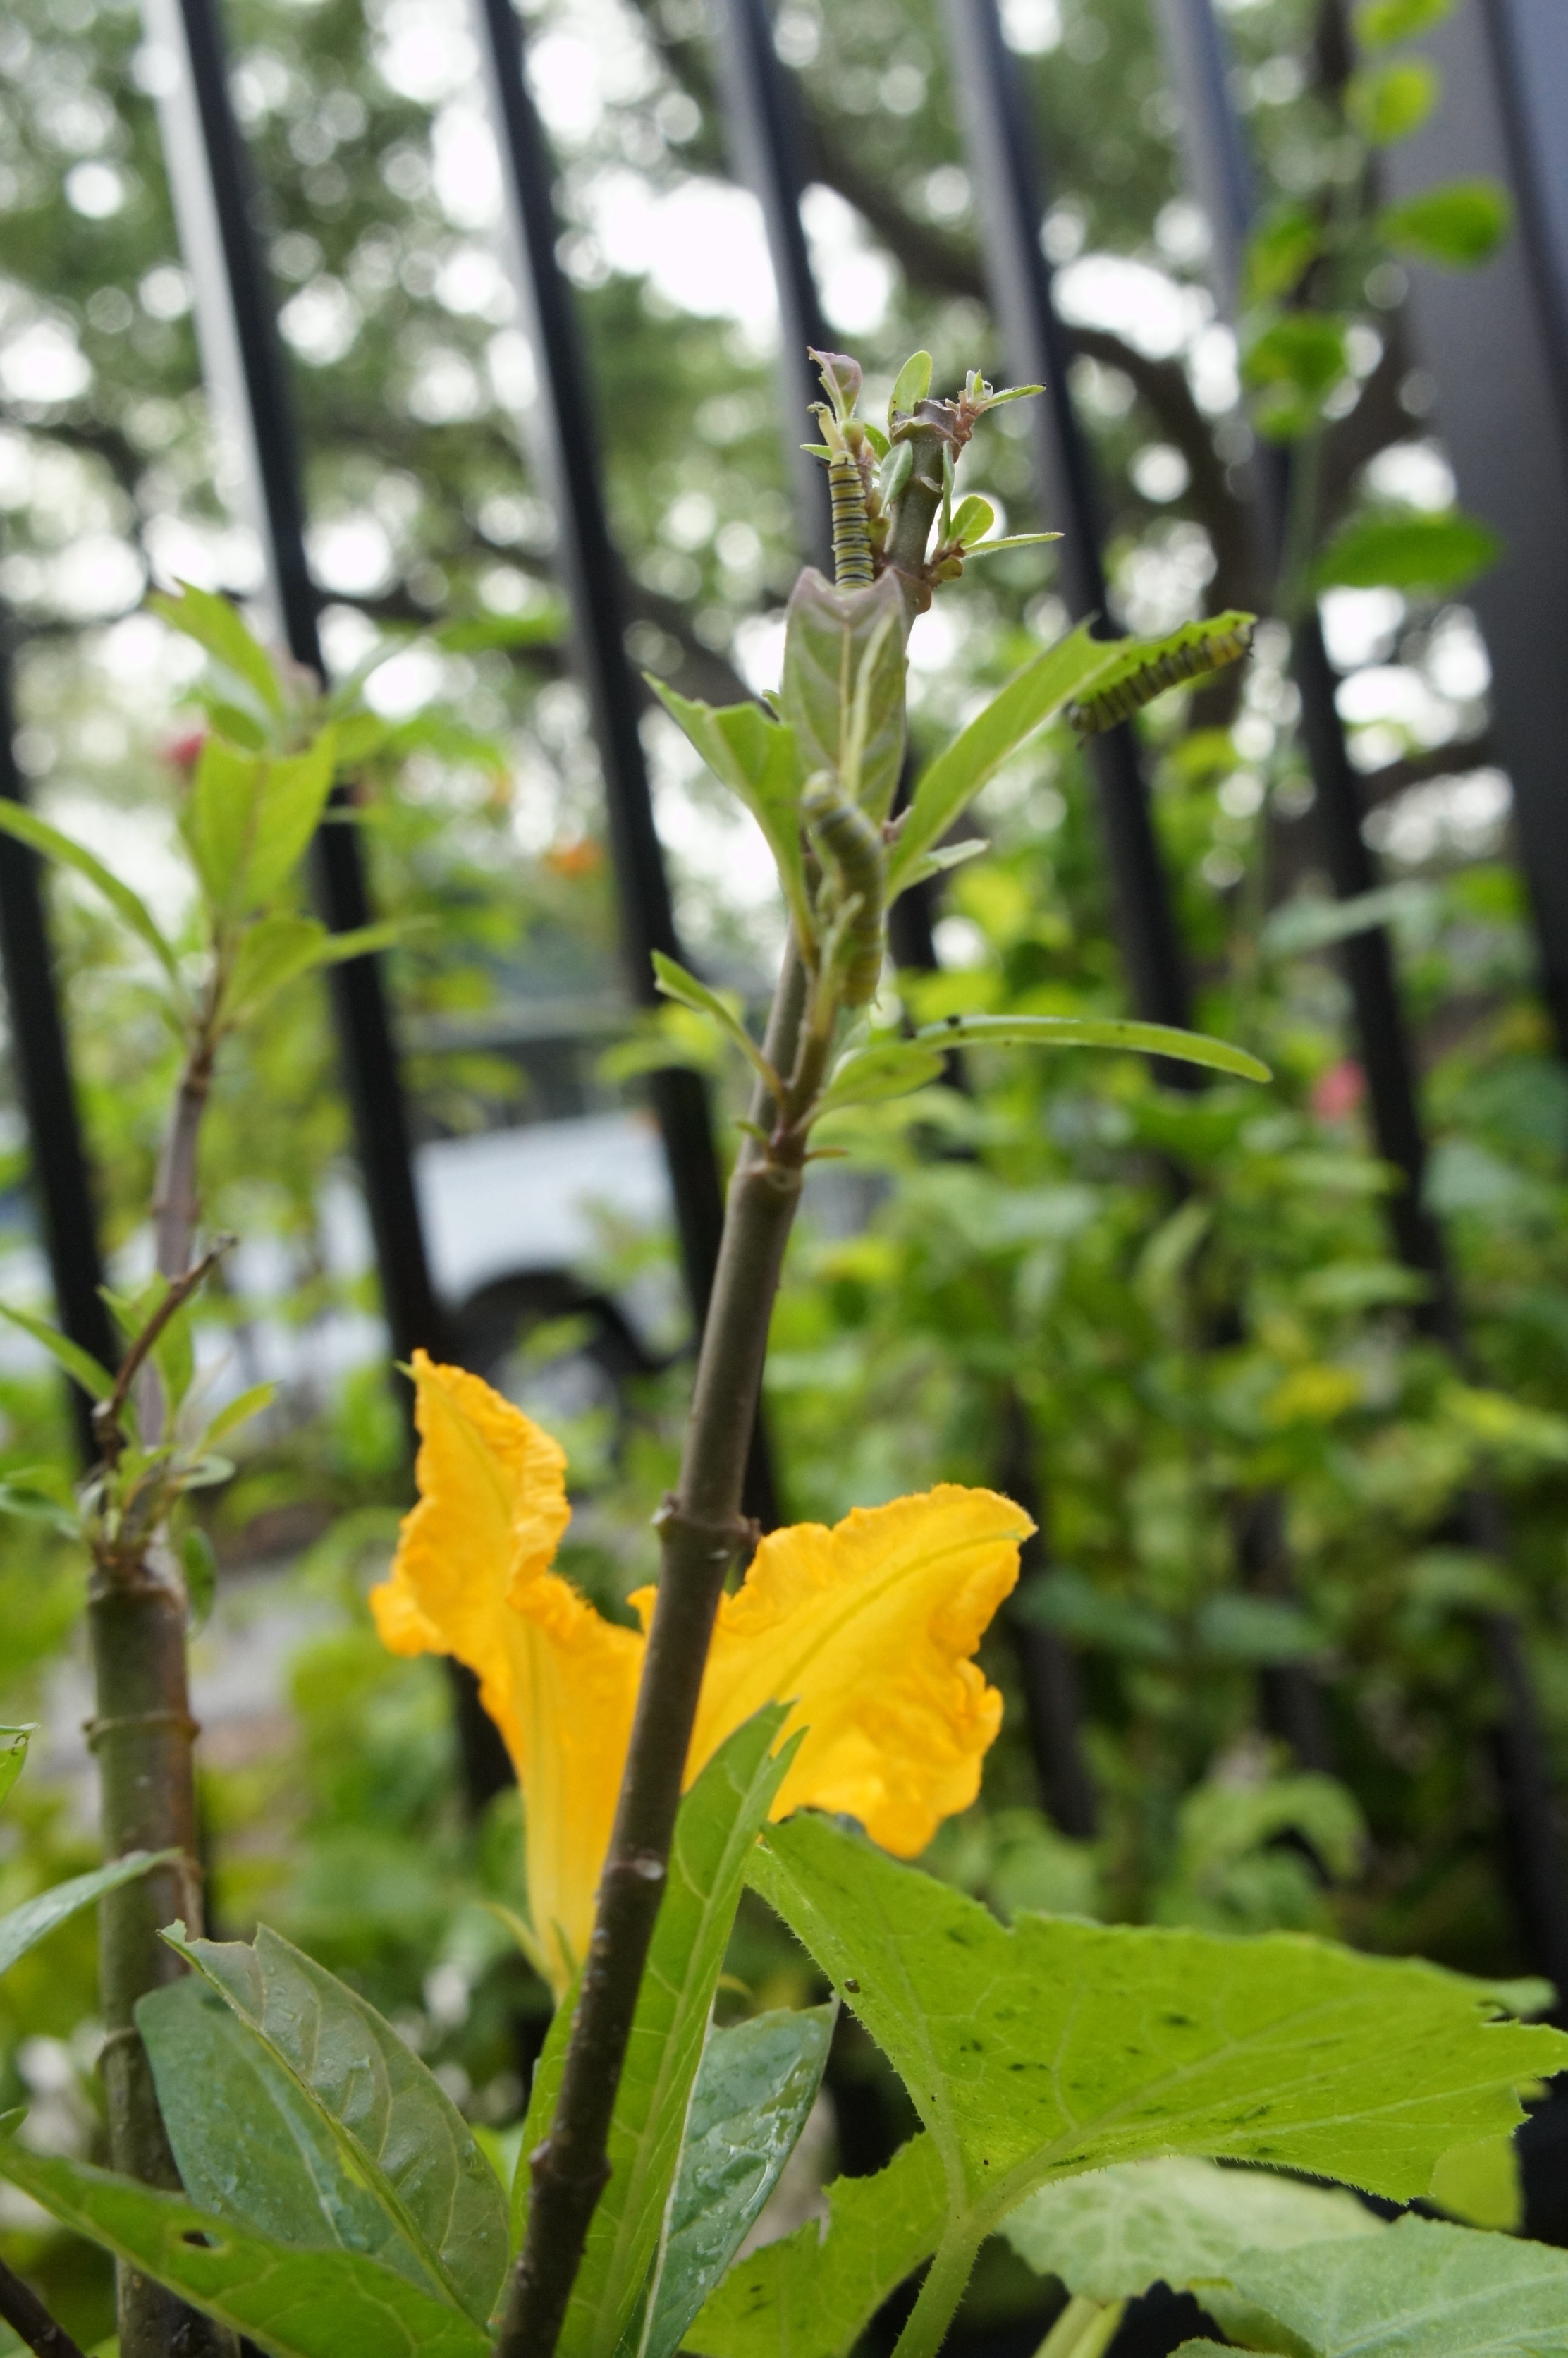
yay! caterpillars and squash blossoms! (2012)
This morning I went out to take some shots of the first squash blossom of the spring. I was thrilled to discover some of my favorite friends had come back to snack at the milkweed/penta bar I always have available. This is one of my greatest joys- watching my milkweed disappear into little caterpillars that turn into butterflies! Beautiful monarchs who feast on the pentas.

Freshly emerged, hanging out on some thyme. (last season)
Spring is such a gift for me this year. The puppy, the surviving bluebonnets and now the arrival of the caterpillars. Mother Nature nurtures my soul, without fail.
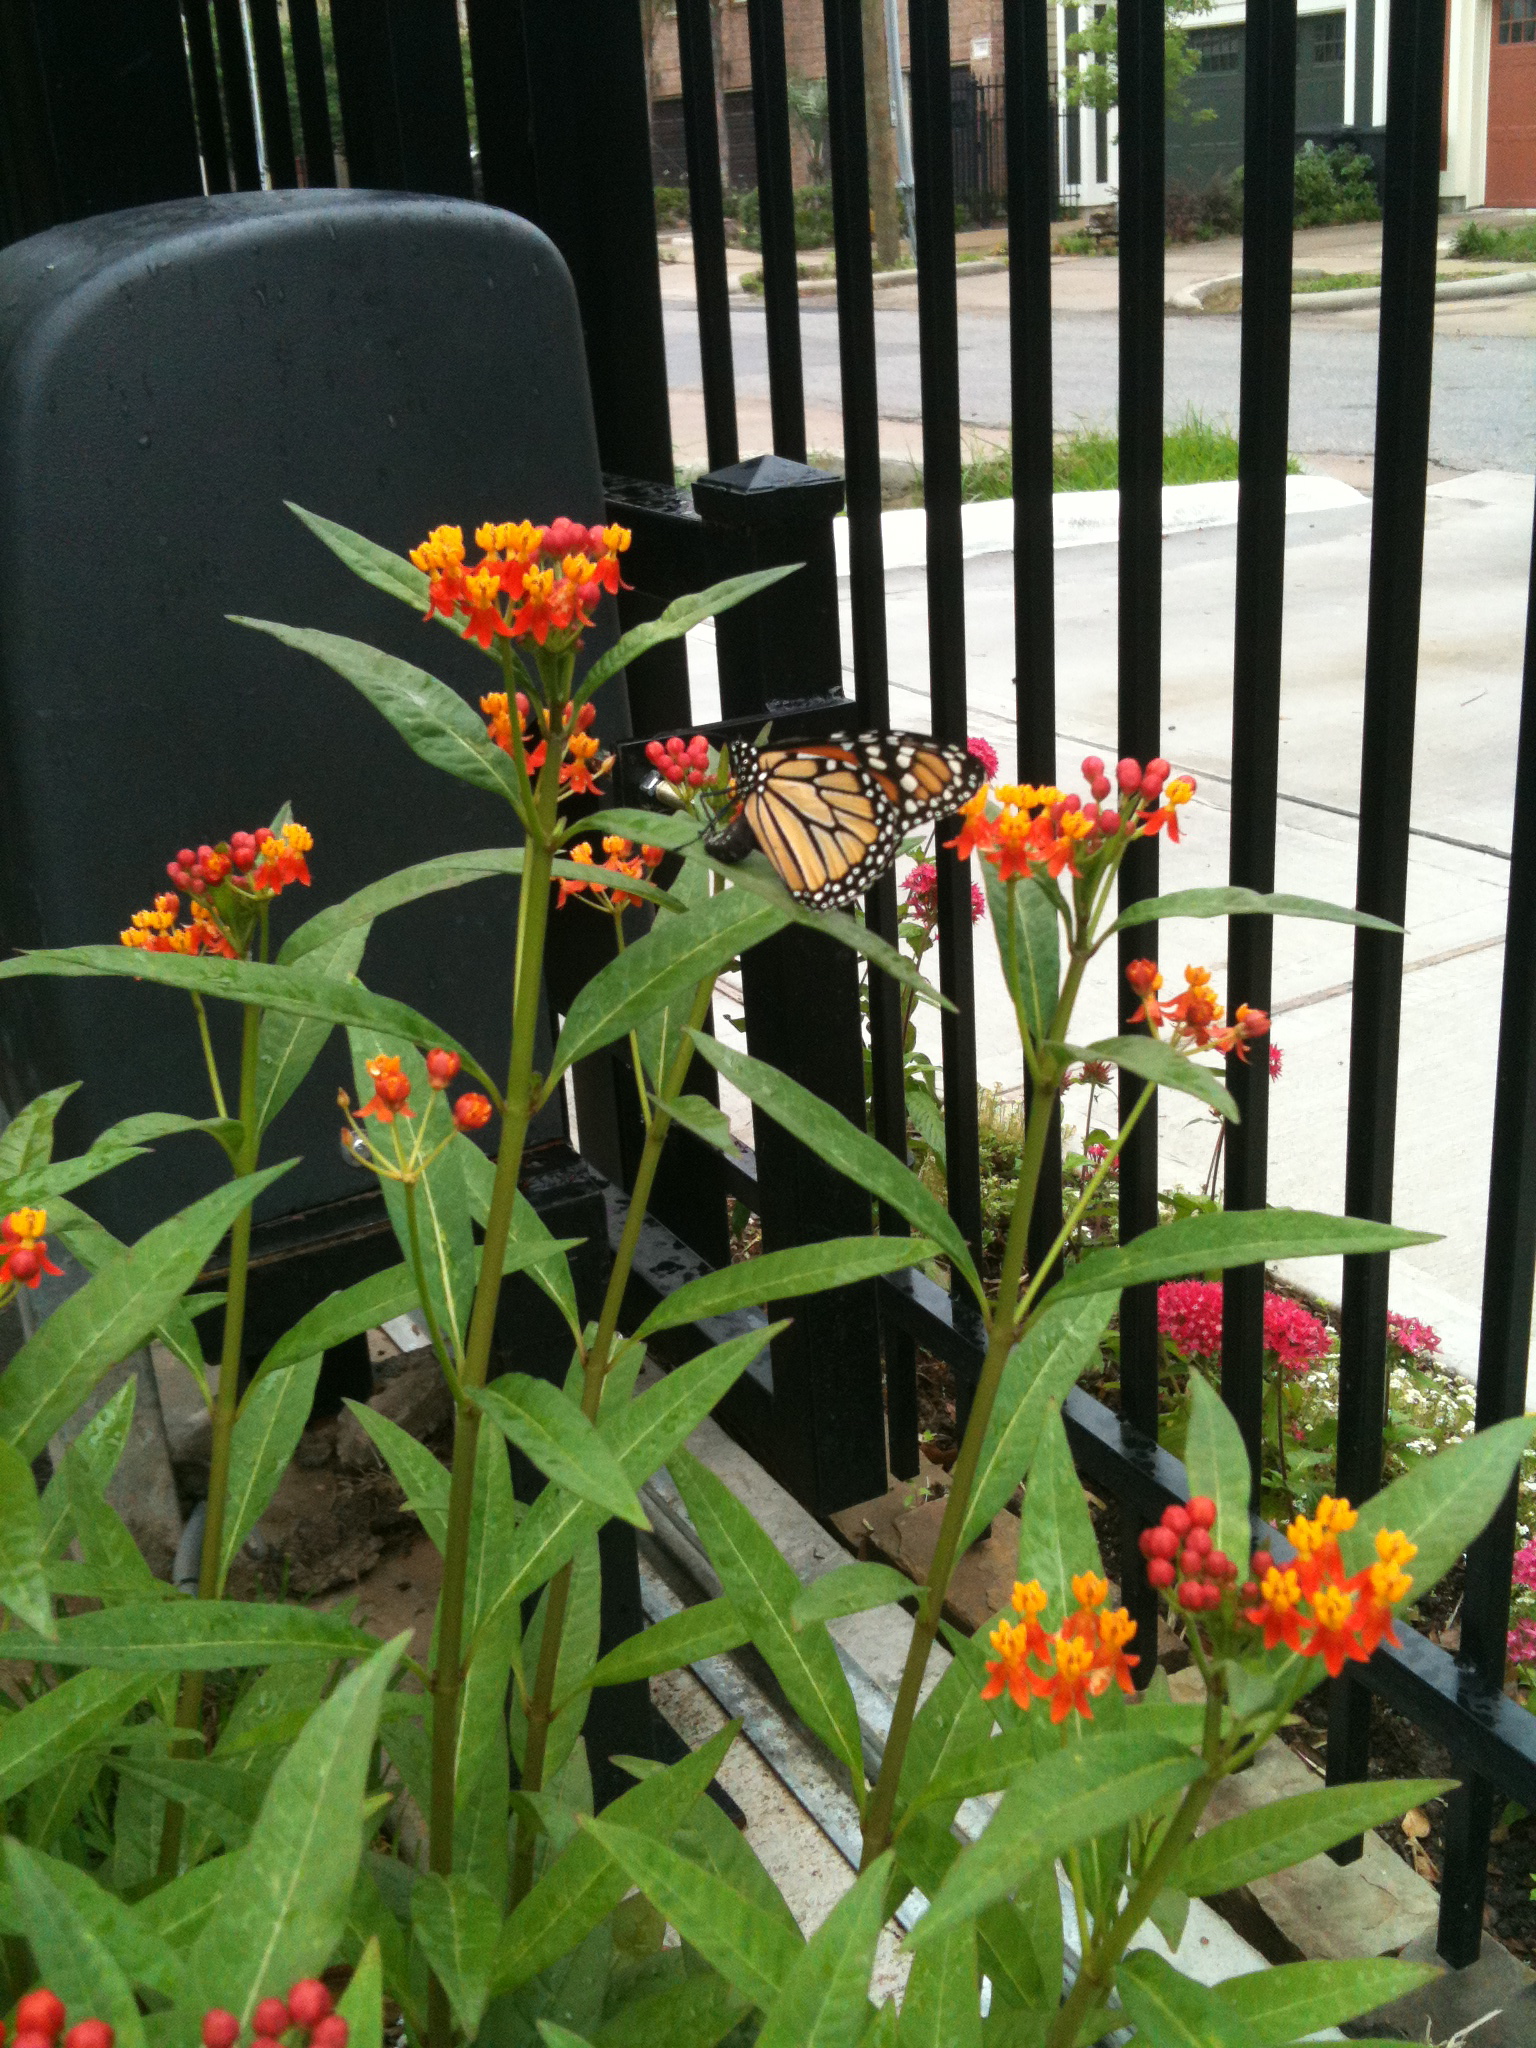
Monarch laying eggs on milkweed. (2011)

one of five bluebonnets that sprung up in my driveway
Cake’s on a Plane

cake's on a plane?
I mentioned a couple weeks ago that my intention was to write about cake but I had just discovered making “No Knead Bread.” I’m still going crazy with this bread technique -I’m cooking it all the time. I’ll talk about that on another post- but for now- I’ve got to tell you about this beautiful cake.
Spring is here Summer is coming and nothing says summer like iced tea. Nothing says Iced Tea like this beautiful cake. When I saw this post on honey & jam.com I knew I was going to make this cake. Hannah Queen is a an amazing young Southern woman who apparently is an amazing cook. Bless my heart, newbie I am, I had no idea! Her bio can attest to her skills she’s been in many magazines… this girl can cook and photography skills are enviable. WOW! I can’t imagine being so put together at such a young age! I digress…
Ms.Queen gives us this Lemon cake … with black tea frosting! Seems inspired! It’s like the most beautiful iced tea you can imagine. The flavors and the photographs in the description this pulled me right in. I made this cake the day after I saw the post! I called this post “Cake’s on a Plane” because in the 1st photograph it looks like this cake is sitting on a plane. Well it looks that way to me… Doesn’t it to you? It’s not on a plane. It’s near my kitchen table. That looks exactly like a plane window to me…
The cake part is pretty straight forward. There is a bit of lemon zest included, but i was a little surprised to see the lemon flavor came from lemon extract and a delightful glaze you pour into a perforated warm cake. The lemon was still quite mild-but of course I had been a citrus binge for a few days. Perhaps a bit of subtlety was missed by me.
I’m just learning about making cakes, and frosting them. I realize now I didn’t put enough frosting between the layers of cake. You can’t really see the middle frosting layer. I’ll know next time. This is what I love about working in the kitchen, there’s always another chance! (and you can eat your mistakes!!)

where's the frosting
I found out since I made this cake that this is a classic Italian meringue frosting. Basically, you make a meringue and add hot syrup to it to while whipping to bring it into this amazing consistency. This recipe has a black tea syrup to give it that beautiful subtle taste of black tea. I enjoyed making this frosting, but I was very concerned about the amount of lost syrup that flew on to the sides of the mixing bowl as the whip worked. I wonder if that is that normal?

To make the beautiful decoration, I had to candy some lemons. This is the first time that I’ve made candied lemon slices or any candied fruit for that matter. I had a great time and it was really delicious learning how to do this! I only needed a few for my cake but I kept putting more in the pan so that I could eat them. And I did. I snacky snacked on them all day. Every time I walked into the kitchen I would eat one, as if to say “Welcome to the kitchen! Congratulations! Have a candied lemon slice!” I did friends, I surely did.

The cake and the frosting are a very light and refreshing combination in this dessert. I had mine with milk! Head over to honey & jam and check out Hanna’s beautiful photos and food! You’ll be absolutely inspired!

Shamrock Hunting

tiny yellow flowers
This morning I was out in the garden with the dogs. I noticed all the clover around. St.Patrick’s day- how appropriate. I also noticed all the different colors of flowers they were growing.

tiny purple flowers
And of course George, as Irish-looking as can be, noticed I wasn’t paying attention to him- and plopped down for one millisecond right in the clover. A short break from puppy-constant locomotion-mode!

precious George.
Have a great weekend friends! And be careful out there, “getting your Irish on!”.

